Tuna Melt

Tuna Melts are somehow a comfort food for me. I don’t recall having an excess of tuna melts growing up but maybe it’s that melted cheddar cheese combined with the tangy tuna on the crusty sourdough that is comforting. And for the cook, when you’re running short of time and have tuna and the fixings in the fridge, this is an excellent quick easy lunch or dinner to prepare. You can just add a salad or veggies and fruit on the side and you have a meal. Sometimes it’s about comfort and efficiency, isn’t it?

An excellent add is guacamole to eat either on the side or on the tuna melt.  I tried thinly sliced avocados under the cheddar cheese and this was a great add. One note, if you care how the presentation is, a perfect avocado turned slightly brown while broiling but it tasted great. When I don’t have to take a photo of my food, I’ll add the avocado for the healthy fats and the flavor.

 Tuna Melt

  • 2 – 7 ounce cans white albacore tuna
  • 1/3 cup plain yogurt
  • 1/4 cup mayonnaise
  • 1/3 cup sweet relish
  • 3-4 stalks celery, chopped
  • 1/2 red pepper, chopped
  • lemon pepper to taste
  • cheddar cheese, grated or sliced, or your cheese of choice
  • crusty sourdough bread loaf, or your bread of choice

Option: Avocado slices, guacamole

In mixing bowl, flake tuna with a fork. Add the yogurt, mayo and sweet relish to the tuna and mix well. Chop celery and red pepper and mix in. Add lemon pepper to taste and refrigerate if not serving immediately.

Cut slices of bread and arrange on a baking sheet. Add tuna mixture to the top of the bread, (option, add avocado slices) then add cheese on top of tuna.

Broil sandwiches in the middle of the oven for about 3-4 minutes, watching to make sure they don’t overcook. Remove when cheese is nicely melted and sandwich is warm.  Serve immediately.

Makes about 4 good sized tuna melts.

Source: Jackie Mack, Lingonberry Lane

Posted in Lunches, Quick Dinners | Tagged , | 2 Comments

Hot Fudge

Since 1998 I’ve been making this hot fudge sauce, thanks to Bon Appetit.  It’s a ‘go to’ recipe when I want a little something homemade for dessert but don’t want to do any full scale baking.  If your Grandma made hot fudge sauce this may be a bit like she used to make.  The rich creamy chocolate has that good old fashioned flavor.  This sauce alongside ice cream and seasonal berries is really a treat.  And, it’s so easy to make – takes 10 minutes – and well worth the effort.   I did change up the recipe and I used whipping cream instead of evaporated milk.  Everything’s yummy with real whipping cream in it.

Hot Fudge

  • 2 ounces unsweetened chocolate
  • 2/3 cup whipping cream
  • 3/4 cup sugar
  • 2 tablespoons unsalted butter
  • 2 tablespoons light corn syrup (or dark)
  • 1 1/2 teaspoons vanilla
  • Dash of  sea salt

In a small saucepan heat the chocolate, whipping cream, sugar, butter and corn syrup until the chocolate bars are melted on medium heat.  (You can chop the bars, but I’ve found if you’re patient they will just melt).  Once the chocolate is melted and the sugar has dissolved bring the sauce to a boil, stirring almost constantly.  Gently boil for 8 minutes while hovering and stirring.  You may have to adjust your heat down to keep sauce at gentle boil.  After 8 minutes, remove sauce from heat.  Add vanilla and salt and serve over ice cream, cake and fresh seasonal fruit.  Makes about 1 cup.

Very important note……Let the hot fudge sauce cool at room temperature fully.  If you refrigerate the sauce before it’s fully cooled, the sauce will become grainy.  Refrigerate after cooled completely.

Posted in Desserts, Sauces | Tagged , , | 3 Comments

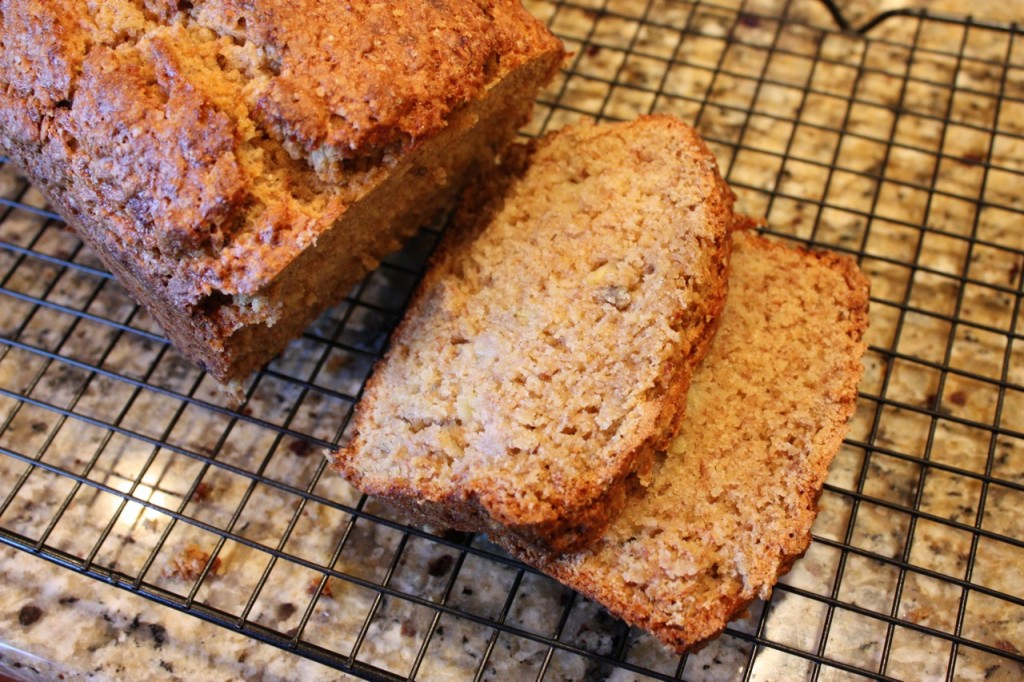
Hearty Banana Bread

My family gets excited when they smell something baking in the oven.  I’ve been trying to eat less sugar in the last year so it’s not often the wonderful aroma of baked goods are wafting from our kitchen.  My daughter did a fair amount of baking during the holidays this year from Grandma’s yummy rolls recipe to ginger cookies she makes with her dad and chocolate chip cookies for the cousins that came to visit.  When I noted a surplus of bananas in the house I knew it was a perfect time to dive into the tried and true Better Homes and Gardens cookbook to get the dough mixing.  I have made this recipe many times over the years and if you’re not concerned with a little added sugar in your life I’d recommend the Streusel-Nut Topping (see Better Homes link above).  I didn’t add the topping or the nuts (only because my family are purists and don’t like nuts in their bread) and adapted the recipe with whole wheat flour and raw cane sugar for a heartier version and increased the spices, as I love banana bread with lots of flavor.  But, I think the real secret to a good rich banana bread is using melted butter instead of cooking oil.

Hearty Banana Bread

  • 2 cups whole wheat flour (or all purpose)
  • 1 1/2 teaspoons baking powder
  • 1/2 teaspoon baking soda
  • 1/2 teaspoon ground cinnamon
  • 1/4 teaspoon ground nutmeg
  • 2 beaten eggs
  • 1 1/2 cups mashed bananas (or 4 medium)
  • 1 cup raw cane sugar (or white sugar)
  • 1/2 cup melted butter

Preheat oven to 350.  In large mixing bowl, combine the flour, baking powder and soda and spices together.  Beat the eggs in a small bowl with a fork and add to dry ingredients.  Mash or cut bananas with a knife and add bananas to mixing bowl (bananas will be chunky in bread if you cut them – I like this in a banana bread).  Add sugar and melted butter to the rest of ingredients and mix until well blended.  Grease large bread pan with butter.  Pour batter into pan and bake at 350 degrees for 55-60 minutes or until toothpick in center of bread comes out clean.    Remove bread from oven, wait about 10 minutes and remove bread to cooling rack.

Make sure to taste bread warm because that’s when it’s the best!

Bundt Baking option: Pour batter in bundt pan greased with butter and bake for 45 minutes. Cool for 10 minutes and then invert bread onto cooling rack. I find the bread bakes more even in a bundt pan.


Posted in Baked Goods, Breads, Snacks | Tagged , | Leave a comment

Super Bowl of Chili

The big weekend is upon us when the Patriots and the Giants face off once again.  OK, that’s about all I know about the Super Bowl this year.  And, this is the first Super Bowl in a LONG time that we won’t be watching.  My daughter has a 12 hour volleyball tournament on this Sunday and as she posted her dismay to the timing on Facebook, her meaning was it is truly un-American to have a 12 hour volleyball tournament scheduled on Super Bowl Sunday!

So I made the chili a few days early this year and we’ll just pretend on Sunday as we’re holed up w/100’s of other families (mostly Moms, I’m sure) at a recreation center with lots of purple and white pride going on and lamenting over the food we’re missing from those Super Bowl parties we missed throwing or attending.

This chili is one that is an adaptation from chili my sister-in-law made for us many years ago.  I loved the sweet taste with the tang of Worcestershire sauce.  So I made a few changes and here is a standard simple chili recipe for the big game.  Topping such as shredded cheese, sour cream and green onions just add to the flavor and enjoyment.

Super Bowl of Chili

  • 1 pound hamburger
  • 2 tablespoons olive oil
  • 1 onion, chopped
  • 3 cloves garlic, minced
  • 1 – 28 ounce can diced tomatoes with liquid
  • 1 – 15 ounce can diced tomatoes with liquid
  • 2 – 15 ounce cans red kidney beans, drained and rinsed
  • 1 tablespoon Worcestershire sauce
  • 2 tablespoons maple syrup
  • 2 tablespoons chili powder or to taste
  • 1 tablespoon cumin or to taste
  • 1/4-1/2 cup red wine
  • sea salt and pepper

In large stockpot, saute hamburger and chopped onion and garlic in olive oil on medium heat.  Cook until hamburger is no longer pink and crumble meat as it cooks.  Drain liquid from meat.  Return stockpot to heat and add both cans of tomatoes and drained and rinsed kidney beans.  Add remaining ingredients to sauce and mix thoroughly.  Cover and simmer on low to medium heat for at least an hour.

Serve with your choice of shredded cheese, sour cream, avocado slices, or onions.  Serves 4-6.


Posted in Beef, Main Dishes, Soups, Winter Season | Tagged , , | 1 Comment

Banana Smoothie


It warmed my heart to hear my middle school daughter walk in the door and ask for a banana smoothie for a snack.  Our simple banana smoothie recipe originated from my daughters time with her friend Catherine from Ireland who lived in the neighborhood for a year when my daughter was in Kindergarten.  Catherine’s Mom would make banana smoothies and they were a hit at my house once I found out the simple but healthful ingredients.   The smoothie is great with any kind of milk but more tasty with higher fat content.  We tried it with 2% and it was yummy.  Feel free to add more ice or sub another seasonal fruit, if you like an icy cold smoothie and mixed fruit flavor.

Banana Smoothie

In blender combine:

  • 2 ripe bananas
  • 1 cup of your favorite milk
  • Big handful or 6-8 ice cubes
  • 1/4 teaspoon vanilla or to taste

Blend and pour into 2 glasses.  Serve immediately.

Posted in Smoothies, Snacks | Tagged , , , | Leave a comment

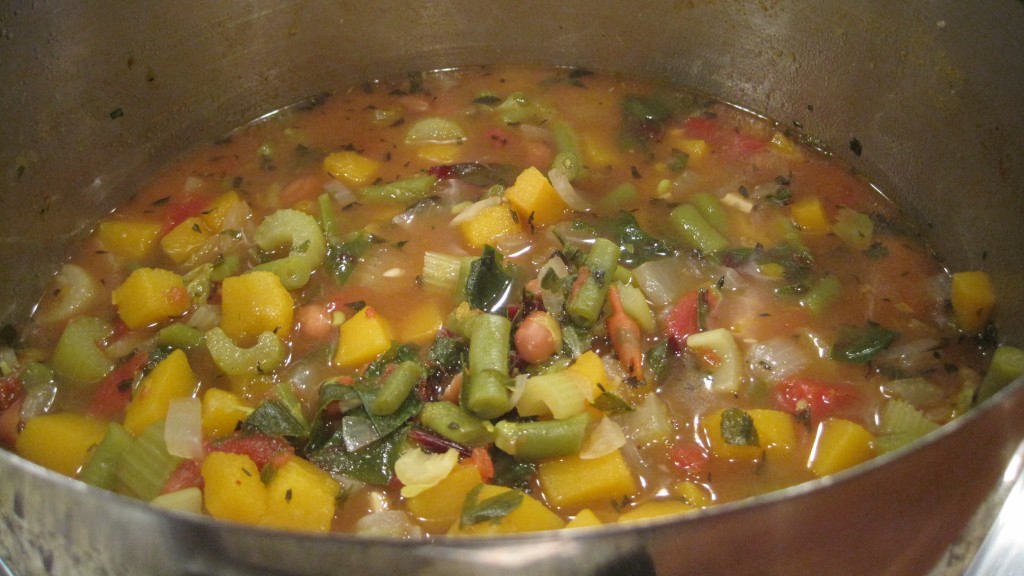
Winter Vegetable & Bean Soup

Winter Vegetable & Bean Soup
When it rains and rains in Portland it’s dreary and it sure does the body and soul good to sit down to a warm homemade soup for dinner.  The soup I am sharing was loosely adapted from Alton Brown’s Garden Vegetable Soup.  I had a butternut squash in stock so I used that instead of potatoes and I felt by using the whole squash I probably had enough Vitamin A in there so I left out the carrots, too.  All in all, I took out a few items and added a few spices, and changed amounts.  That’s’ what I love about cooking a soup or sauce – it’s flexible!  Try your own variations, it can be really fun to get creative.

Winter Vegetable & Bean Soup

  • 4 tablespoons, olive oil
  • 2 cups chopped leeks, white part only
  • 4 cloves minced garlic
  • 1 butternut squash, peeled, cleaned and chopped into bite size pieces
  • 2 cups of green beans, cut into 1/2 inch pieces (can be frozen)
  • 2 quarts chicken or vegetable broth (I used on of each)
  • 1 – 14 1/2 ounce can of fire-roasted, diced tomatoes (or just diced tomatoes)
  • 1 cup fresh, chopped, parsley leaves or 2 tablespoons dried (I had fresh on hand)
  • 2 tablespoons lemon juice
  • 4 bay leaves
  • 2 tablespoons dried basil
  • 2 tablespoons dried thyme
  • 2 – 15 ounce ounce cans pinto beans or any bean of your choice, rinsed and drained
  • 2 cups chopped beet greens or fresh spinach
  • Sea salt and pepper to taste

Heat the olive oil in a large stockpot over medium to low heat.  Add the leeks and garlic and a dash of salt and cook until softened but not brown.  Add the squash and green beans and continue to cook for 5 more minutes, stirring occasionally. Add the stock, turn to high heat and bring to a simmer.  Once simmering, add the tomatoes, parsley, lemon juice, bay leaves, basil, parsley and thyme.  Simmer 1-1.5 hours. Add the beet greens or spinach just before serving.  Season to taste with sea salt and pepper.  Remove bay leaves and serve.


Posted in Main Dishes, Soups, Vegetarian, Winter Season | Tagged , , , | Leave a comment

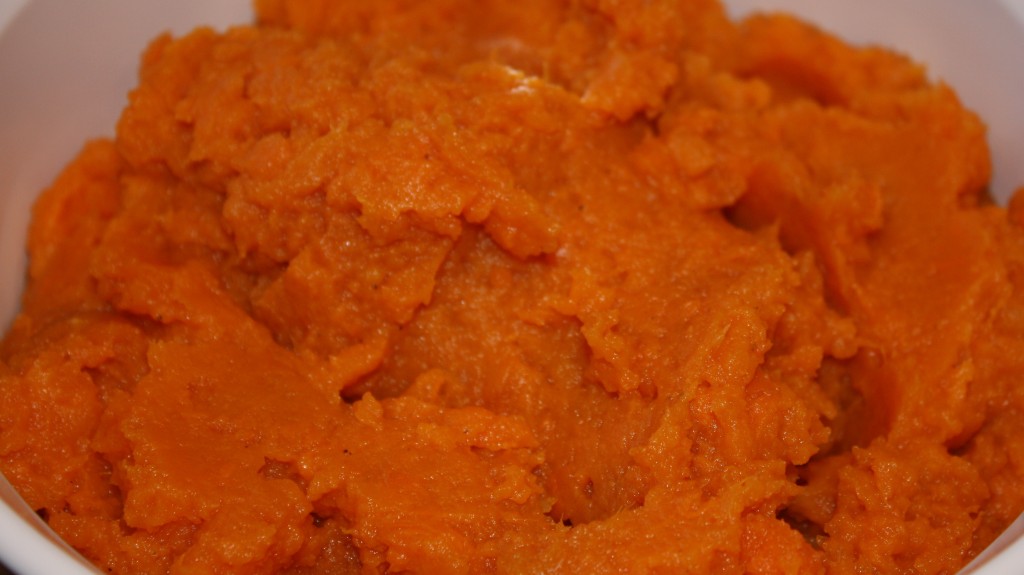
Steamed Mashed Yams

Steamed Mashed Yams

Steamed Mashed Yams is a seemingly simple recipe with very few ingredients.  But, I find every time I make this recipe it is simply delicious and worth sharing.   I would say the inspiration for my mashed yams was from my mother-in-law who would make mashed squash with butter for special meals.   The mashed squash was always a hit and the add of butter and salt and pepper brings out the true flavor of the root vegetable.   I do make mashed squash on occasion but my favorite is the yams.  I steam them, then peel, mash, add butter salt and pepper and they’re ready to serve.  This is a dish for a warm winter meal that is a great make ahead recipe, too.  You can easily warm this in a covered casserole to serve later in the day or even the next day.

A little story of yams in my home and my husband previous distain for them.  My husband is really appreciative of the food I serve overall but a few years back he would always say he didn’t like yams when I served them and wouldn’t even try them.  Well, I knew he loved his mothers mashed squash.  So, maybe that’s why I made mashed yams for the first time?  The hubby asked, ‘what is this’, and I replied ‘squash’ to my mashed yams.   He tried them and has loved them ever since.  Who knew a little trickery would get these delicious nutritious tubers down my husbands gullet!

Steamed Mashed Yams

  • 6-8 yams
  • 2 tablespoons butter or to taste
  • sea salt and pepper

Wash and scrub the yams.  Do not peel (until after cooked).  Cut into 2 inch pieces and cut the ends off.   Place yams into large sauce pan with steamer insert.  If you don’t own an insert just use same large sauce pan.  Add 1-2 inches of water on the bottom of pan.  Heat to a boil, reduce heat to about medium and add yams.  Steam in covered pan until yams are soft but not mushy.  Add water if low.  Steam the yams about a 20-25 minutes.    When yams are soft, turn off heat and uncover to cool.  Remove skin from cooled yams and put the yams in a mixing bowl.  Mash the yams with a small potato masher or electric mixer.  Add the butter and salt and pepper and mix.   Transfer to small casserole dish (you can mash in casserole if you don’t care about a few yams on the side dish).  Serve immediately or refrigerate to heat in oven later.


Posted in Holiday Recipes, Side Dishes, Vegetarian, Winter Season | Tagged , | 1 Comment

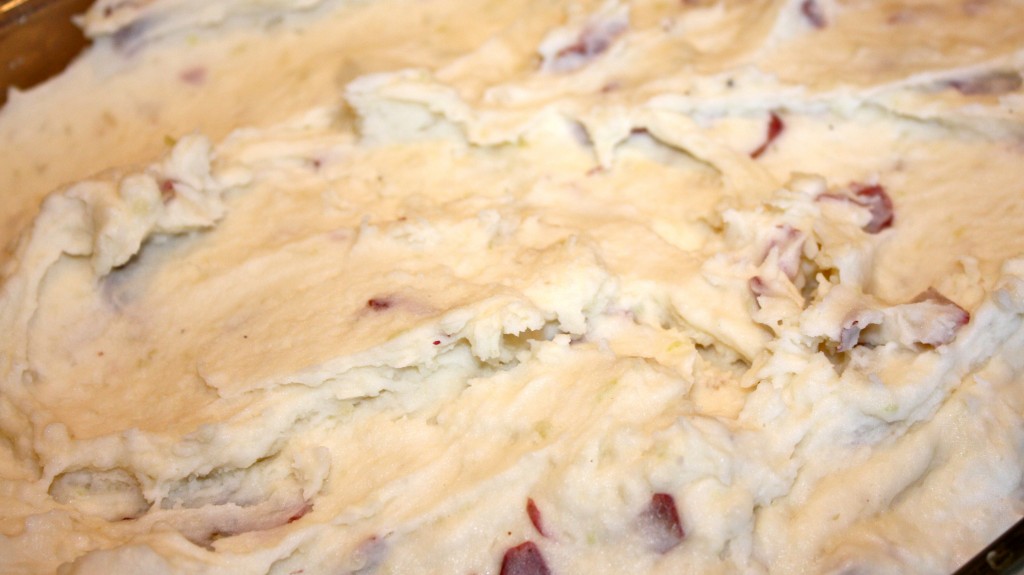
Creamy Make-Ahead Mashed Potatoes

Back in 2009, I noted on the cutout newspaper recipe that this was in the Thanksgiving Food Day special in The Oregonian Food Day  section.   I’m immediately interested in any do ahead recipes for the holidays or special occasion recipes for any time of year that warrants a good creamy mashed potato casserole.  The Oregonian adapted this recipe from ‘Thanksgiving 101″ by Rick Rodgers.  I made this recipe on Thanksgiving 2009 and again this year at Christmas.  I would make it for another occasion when making mashed potatoes ahead is a plus, perhaps when entertaining for a mid winter meal.   It is more than delightful to host a group of friends or family and have the dishes made ahead and in the oven.   This is a proven fluffy, creamy potato recipe and a delicious accompaniment to turkey, beef and gravy or a vegetarian meal or any time your family is craving good old fashioned mashed potatoes.

Creamy Make-Ahead Mashed Potatoes

  • 5 pounds baking potatoes (Russet, Idaho or Red as I used)
  • 1 –  8 ounce package cream cheese at room temperature
  • 1 cup sour cream
  • 1/2 cup half and half (or your choice of milk)
  • 1 teaspoon sea salt
  • 1/2 teaspoon pepper
  • optional – chives, green onions

Fill a large stock pot halfway with cold water.  Peel potatoes (if using Red, you don’t need to peel as I did not).  Cut the potatoes into 1 1/2 inch chunks and put them in pot.  Add more cold water to cover the potatoes.  Cover and bring to a full boil, then reduce heat, and set lid on stock pot but to the side to let steam escape.  Boil for about 20 minutes until potatoes are tender but not overcooked.

Drain potatoes (I drained in same pan with lid on tight) so that there is no water left in pot with potatoes.  Add cream cheese to warm potatoes.  Using a hand held mixer, mash the potatoes until the cream cheese melts.  Beat in the sour cream and half and half or milk.  Season with 1 teaspoon salt and pepper.  Transfer potatoes to a buttered 9 x 13 baking dish.  Cool completely.  The potatoes can be prepared up to a day ahead and covered and stored in refrigerator.

When ready to bake, remove potatoes from refrigerator and preheat oven to 375 degrees.  Bake casserole until the potatoes are heated through about 30 to 40 minutes.  Serve hot sprinkled with chives if you choose.


Posted in Holiday Recipes, Vegetarian, Winter Season | Tagged , , , | 1 Comment

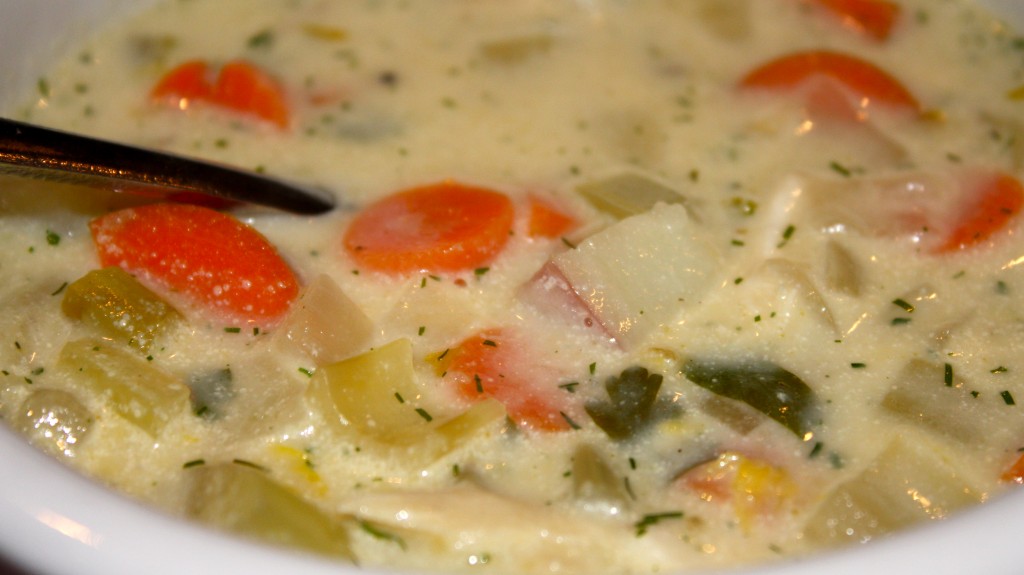
Seafood Chowder

Winter is the time to get out those warm and cozy soup recipes and revisit them.  I was feeling like this on Sunday.   If I haven’t gotten to cook a good meal for a few days

Seafood Chowder

Sunday is the day to cook a nice dinner.  We’d had beef on Friday and then the leftovers and we needed a change.  I got out the chowder recipe I’d thrown together sometime over the years and had actually written down after thinking it was good.  In the past I would usually add leftover salmon to this chowder.  Grilled leftover salmon in chowder is THE BEST!  But it’s a little cold for grilling so I had two Mahi Mahi filets in the freezer.  That became dinner on Sunday with an added crusty bread and butter on the side.  Dinner was very satisfying.

Seafood Chowder

  • 1 onion, chopped and sauted in olive oil or butter
  • 1 cup diced celery
  • 1 cup diced carrots
  • 2 red potatoes, diced
  • 1 1/2 cups chicken broth
  • 1 1/2 cups water
  • 2 fillets of your favorite fish (can be frozen) or 2 – 7.5 oz cans of red salmon
  • bunch of fresh parsley chopped
  • 2/3 cup half and half
  • 3 tablespoons flour
  • sea salt and pepper to taste
  • lemon pepper to taste (at least a tablespoon)
  • Option:  1/2 teaspoon dried dill

Saute onions in olive oil or butter until tender.  Add carrots, celery and potatoes – chopped.  Add liquid and parsley and spices.  Cook until veggies are tender, about 30 minutes.  Add half and half and flaked fish.  If using canned salmon you can add the juices in the can.  If fish is frozen cook 10-15 minutes in broth, then chop fish into small pieces. Serve with crusty bread and butter.

Posted in Main Dishes, Seafood, Soups, Winter Season | Tagged , | Leave a comment

Curried Coconut Chicken

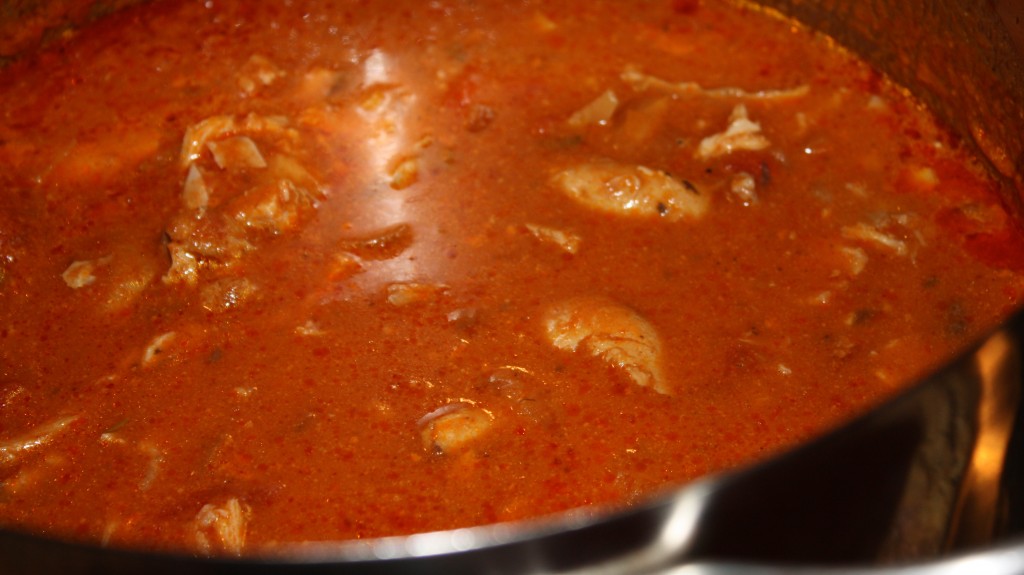
I must have a taste for curried chicken lately as today I decided I must use the coconut milk in my cupboard and of course coconut milk is a natural curry partner.

Curried Coconut ChickenI found this recipe on allrecipes.com submitted by Roma.   It’s a good one!  Of course, I adapted the recipe a bit, because that’s my nature when making a pot of something. Roma used skinless bones chicken breasts and I used 5 frozen chicken thighs with bones and skin and all.   I like the flavor of the skin and the bones add more minerals to the broth and the flavor is just fantastic!    Roma called for 1 1/2 teaspoons of vegetable oil and I used coconut oil instead.  The other important omission was the sugar.  The curry was fantastic without the added sugar.  There’s actually cane sugar in the stewed tomatoes I used.  So there you have it!  A new recipe for the family and a keeper.

Curried Coconut Chicken

  • 2 pounds (or 5 meaty chicken thighs with skin and bones) chicken, chopped if using boneless/skinless
  • 1 teaspoon sea salt and pepper to taste
  • 1 1/2 tablespoons coconut oil
  • 2 tablespoons curry powder
  • 1 small onion, chopped
  • 2 cloves garlic, crushed
  • 1 (14 oz) can coconut milk (I used about 2 cups + a splash extra)
  • 1 (14.5 oz) can stewed, diced tomatoes
  • 1  (8 oz) can tomato sauce

Season chicken pieces with sea salt and pepper.  Heat coconut oil and curry powder in a large stock pot.  Add onions and garlic and seer chicken.  If chicken is cut, stir to coat with curried oil.  Cook chicken in oil for about 10  minutes.

Add stewed tomatoes and tomato sauce.  Continue cooking chicken in sauce until thoroughly cooked through.  I cooked the chicken thighs at least a 30-40 minutes.  When chicken is cooked through, add the coconut milk and simmer another 10 minutes.

If chicken has bone and skin on, remove the pieces from the stock pot and debone.   Cut up chicken in small pieces and return to stock pot.

Serve with your favorite rice and salad or green vegetable.


Posted in Chicken, Main Dishes, Winter Season | Tagged , , | Leave a comment