Fried Chicken with Lime and Cilantro

First of all, the gorgeous photo above is not Fried Chicken, it’s our flowering pear in the front yard.  On Saturday afternoon last weekend, before her soccer carpool arrived, my daughter grabbed my ‘good camera’ and went out and took some spring shots in our yard. It’s a keeper…maybe even for a frame.

Now, on to the chicken.  I experimented with chicken thighs this week and was happy that the family gave it rave reviews.  I do think to myself, how aren’t chicken thighs with skin, bones and all fried in butter just yummy on their own?  All that great flavor from the skin and bones fried and browned really would be a great dinner with just salt and pepper.  But I did add a few more seasonings and cilantro (I recently read that cilantro is a food that detoxifies and we all can use a little of that). So, I’m sharing with you my creation of Fried Chicken with Lime and Cilantro.  It’s fall off the bone good.

Fried Chicken with Lime and Cilantro

  • 8 large chicken thighs with skin and bones
  • 2 tablespoons butter
  • 3 cloves garlic, minced or chopped
  • 1 teaspoon cumin
  • 1 large onion
  • 4 tablespoons chopped cilantro
  • 1 lime
  • sea salt and pepper to taste

In large skillet melt the butter on medium heat and add the chicken thighs skin down.  Add minced garlic to the pan.  Let the chicken sear and once turned over sprinkle a bit of cumin on each thigh and give each thigh a good squeeze of fresh lime juice plus salt and pepper. At about 30 minutes into the cooking, slice the onion into wedges and add all to the pan.  Let the chicken cook (turning every 10 minutes or so) for at least 45 minutes or even longer, turning occasionally while stirring onions, to make sure the thighs are cooked evenly all the way through and are nicely browned.  Just before serving add the cilantro on top. Serve chicken and fried onions with a green salad.  Serve 4.

Source:  Jackie Mack, Lingonberry Lane

Posted in Chicken, Main Dishes | Tagged , | Leave a comment

Cheesy Quiche

Hopefully, if you celebrate Easter, the bunny is ready to deliver those sparkly baskets in your home. My strongest memory of an Easter basket was when our dear friend Jean brought the Mack kids the biggest basket we’d ever seen chocked full of all different sorts of candies and gifts.  This was amazing to me as a child and I remember one year we got to celebrate Jean’s birthday and my brother’s birthday on Easter Sunday.  That must have been the year my Mom made the bunny cake with the seven minute frosting that decorations stuck to any which way.  2012 is another year of a birthday and Easter celebration on the same day.

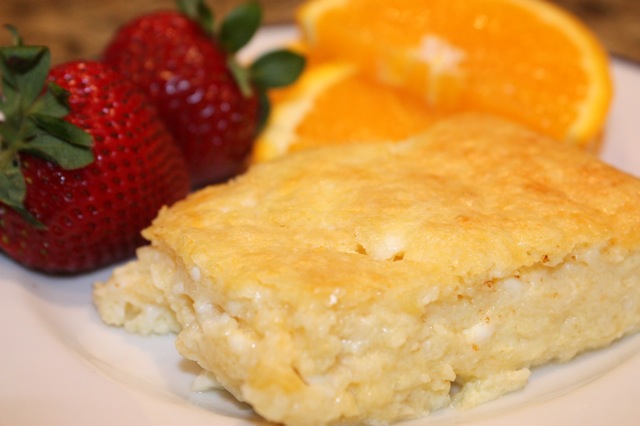
Besides the egg hunts and Easter baskets, celebrations of Passover and spring, we all need an easy egg recipe in our back pocket. Friends of ours who had moved to Colorado years ago gifted us the Colorado Cache Cookbook by The Junior League of Denver. One of my favorite recipes from the cookbook is their Crustless Quiche.  It’s quick and easy and turns out every time.  You can change the recipe up a bit to your liking – choose your cheese, add veggies or meat – but here at home, we like it just plain, cheesy and simple. This recipe is great for a brunch or lunch with the ladies or even a family dinner when you want to change things up from the meat and potatoes regimen.  If you’re looking for an easy egg dish for Sunday morning, this would be a great choice.  I have made it the night before, refrigerated it and cooked it in the morning.

Cheesy Quiche

  • 1/4 pound butter or 1 stick
  • 1/2 cup whole wheat pastry flour
  • 6 large eggs
  • 1 cup milk
  • 2 cups shredded cheese of your choice
  • 2 cups cottage cheese
  • 1 teaspoon baking powder
  • 1/2 teaspoon sea salt

Preheat oven to 350 degrees.  Melt butter in a small saucepan, add the flour and mix thoroughly until smooth.  In another large bowl, beat the eggs, add the milk, shredded cheese and cottage cheese, baking powder and salt and combine. Mix in the butter/flour with the eggs. When well blended pour all into a buttered 9×13 inch pan.  Bake uncovered for 45-50 minutes at 350 degrees.  Serve warm.

Options: Serve with guacamole and salsa or green onions and tomatoes on top.

Source: Adapted from the Colorado Cache Cookbook and the Junior League of Denver

Posted in Breakfast, Brunch | Tagged , | 5 Comments

Buttery Baked Apples with Cinnamon and Cream

I’m always searching for desserts that will satisfy a sweet tooth and provide good nutrition at the same time. Last year I took a hiatus from processed sugars and baked apples with butter and cream were a transition dessert. They provided the naturally sweetened apple juices with rich butter and cinnamon. Given this winning combination, no added sugars are necessary.  If you top the apples off with real whipping cream for more rich flavor the dessert is quite satisfying.  I can honestly say when eating these baked apples with cream, I don’t miss the sugar.  The goodness of real cream and good old fashioned apples combine for a lovely winter dessert in the post Spring Break rainy season.

Buttery Baked Apples with Cinnamon and Cream

  • 3 large apples of your choice
  • 2 tablespoons fresh lemon juice
  • 4 tablespoons butter
  • 1/2 teaspoon cinnamon
  • 8 oz heavy cream
  • 1 tsp vanilla

Preheat oven to 350 degrees.  Slice 3 apples and mix them in a bowl with the fresh lemon juice. Melt butter in a small pan on low heat. Add cinnamon to butter and combine. Pour butter mixture over lemony apples and mix well. Pour apples into 8×8 glass baking dish. Bake apples for 45-50 minutes or until golden brown and apples are soft.  Mix apples at least 3 times during baking to keep the apples moistened with butter/apple juices.

Beat heavy cream with electric mixer until formed into creamy peaks and add vanilla.  Serve apples warm topped with whipping cream.  Serves at least 4.

Option:  These apples and cream are also excellent served on top of an oatmeal or hot cereal for an early morning treat.

Source:  Jackie Mack, Lingonberry Lane

Posted in Baked Goods, Breakfast, Desserts, Winter Season | Tagged , , | Leave a comment

Buttermilk Pancakes with Blueberries

This post is a result of a 2 hour school delay and a beautiful blanket of snow that fell in Portland overnight.  The new superintendent is almost a hero as this was the first 2 hour delay he bestowed upon the students of the west foothills this year.  My daughter woke up and was delighted to have a ‘day off’ of school until I informed her the start time was 11am instead of 9am (lucky middle schoolers get to start at 9am).  So, given the extra time and the buttermilk I had in my fridge needing to be used, a pancake was born.  I usually go to my trusted Better Homes and Gardens cookbook for basic bread recipes and I did again this morning.

Trying to lessen the carb load I used whole wheat pastry flour and omitted the sugar.  I doubled the recipe, replaced the cooking oil with melted butter and added vanilla.  I also greased the griddle with butter and added frozen blueberries.  My daughter ate the pancakes with peanut butter and maple syrup as is a long held custom in the Mack family and dear to my heart as well as my taste buds.

Buttermilk Pancakes with Blueberries

  • 2 cups whole wheat pastry flour
  • 2 teaspoons baking powder
  • 1/2 teaspoon baking soda
  • dash of salt
  • 2 beaten eggs
  • 2 cups buttermilk
  • 4 tablespoons melted butter (1/2 stick)
  • 1 teaspoon vanilla

Combine all ingredients in a large bowl and mix well until smooth.  Add extra buttermilk if batter is too thick for your liking.  Heat griddle to medium heat.  Test a small pancake to make sure the griddle is hot enough.  Grease griddle with butter and pour the pancake batter onto the griddle. Add a heaping tablespoon of frozen blueberries onto each pancake.  Cook about 2 minutes on each side or until golden brown.  Serve with butter and maple syrup or your choice of creative toppings.

Source:  Adapted from Better Homes and Garden cookbook.

Posted in Breakfast | Tagged , | 7 Comments

Cranberry Raisin Granola Bars

I’m thinking about Spring Break and the old fashioned trip we’re taking to the mountains far far away.  We’ll pack the SUV to the gills with ski and snowboard gear piled high and a little cooler and more clothing than we need.  I’ll have at least 3 jackets because I never want to get cold on the slopes and big boots and chains for the car, just in case.  (We’re from Oregon, we never want to get caught without chains in the car on the mountain, it’s the law…) So, Spring Break, and a long car ride equals a healthy snack to get us by that doesn’t come out of a package.

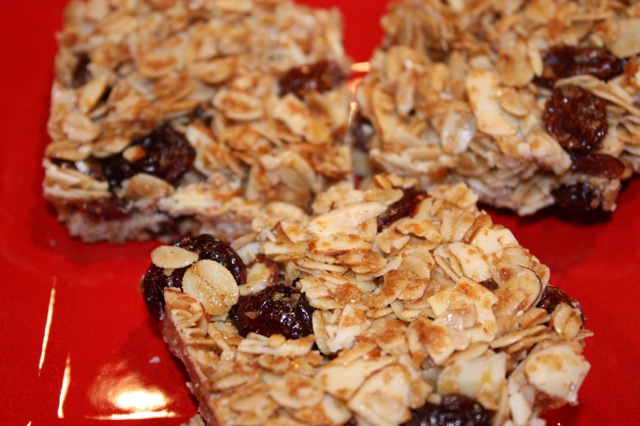
This blogging habit is good for me as this was another first making granola bars and I’m not sure what took me so long – easy!  I found a recipe that Deb at Smitten Kitchen had made and I adapted it.  I didn’t have any shredded coconut in the house but I have lots of coconut oil and given it’s such a healthy saturated fat I wanted to get that flavor of good oil in there.  So I put in less honey and dried fruit and added coconut oil.  I was actually thinking I may just get granola out of my granola bar experiment but the directions said to cool for 2 to 3 hours and the bars did actually turn into bars and stick together after at least 2 hours.  The family gave the granola bars a thumbs up.

Cranberry Raisin Granola Bars

  • 2 cups rolled oats
  • 1 1/4 cups sliced almonds
  • 1/2 cup toasted wheat germ (this comes toasted in the jar – check the label)
  • 1/3 cup honey
  • 1/3 cup coconut oil
  • 1 1/2 teaspoons pure vanilla extract
  • 1/4 teaspoon sea salt
  • 1 cup dried fruit (cranberries, raisins, currants, apricots or mangos sliced, any dried fruit)

Preheat the oven to 350 degrees.  In a 9×13 baking pan add the oatmeal and almonds.  Bake the oatmeal and almonds for 10 minutes to ‘toast’, stirring occasionally, until lightly browned.  Remove mixture from oven and turn your oven down to 300 degrees.

If you have an glass oven safe mixing bowl add the honey and coconut oil to the glass bowl and put in the oven at the same time as the oats and almonds.  When the honey and coconut oil are melted, remove from the oven.  If your mixing bowl isn’t oven safe you can melt the honey and oil on the stovetop.

In your mixing bowl combine the melted honey/oil and oatmeal/almonds.  Add wheat germ, vanilla and salt and throughly combine until mixture is nicely coated.   Then mix in your dried fruit combination.

Grease your 9 x 13 pan with butter using a spatula (because the pan is hot!) and pour your granola into the pan (when this is complete make sure you lick your spoon, I did.).  Press granola firmly and pat down flat with a silicon spatula.

Bake the granola bars for 25 minutes until golden brown.  VERY IMPORTANT:  Cool for 2 to 3 hours.  They will not be a chewy granola bar right out of the oven, they must set.  After cutting, store the bars in an airtight container.  The bars can also be frozen.

Source:  Adapted from Smitten Kitchen.


Posted in Baked Goods, Snacks | Tagged , , | 2 Comments

Irish Soda Bread with Currants

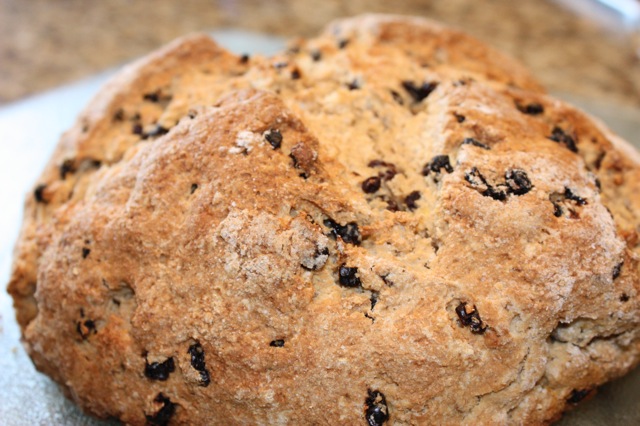
This is the week to embrace my Irish heritage. Today I experimented as I’ve never made Irish Soda bread and it turns out it was a fun and delightful experience. I adapted Ina Garten’s soda bread recipe from the Food Network. Traditionally this bread was made from white flour with savory flavor. According to Wikipedia, ‘whole meal’ soda bread is known in Ireland as ‘wheaten bread’ and is usually sweetened. I used whole wheat pastry flour for my bread and embraced Ina’s sweet ingredients using orange zest and dried currants. I loved the product but am partial to having a piece straight out of the oven with Kerry Gold butter. After all, that’s when bread’s in it’s best form.  From what I’ve read, it’s good to have a crowd on hand when you make this, as soda breads are best the 1st day. Don’t forget serve it slathered in butter.

Irish Soda Bread with Currants

  • 4 cups whole wheat pastry flour
  • 4 tablespoons sugar (I used organic cane sugar)
  • 1 teaspoon baking soda
  • 1 1/2 teaspoons sea salt
  • 4 tablespoons (1/2 stick) cold unsalted butter, cut into small pieces
  • 1 3/4 cups buttermilk
  • 1 egg, beaten
  • 2 teaspoons grated orange zest
  • 1 cup dried currants (or raisins)

Preheat your oven to 375 degrees. Butter the bottom of a baking dish.  I used a 9×13 pan.

Combine the flour, sugar, baking soda and sea salt in an electric mixer, preferably with a paddle. Cut the butter and add, mixing on low speed until the butter is combined with the flour mixture.

Lightly beat the egg with a fork in a small bowl. Add the buttermilk and orange zest to the egg and combine. Mixing on low speed, slowly add the buttermilk mixture to the flour combination. Mix 1 tablespoon flour with the 1 cup of currants in a separate bowl so the currants are coated. Add the currants to the flour mixture on low speed. The dough will be wet looking.

Turn the dough onto a floured surface and knead a few times to form into a round loaf.  Place round loaf on buttered pan or baking sheet. Cut an X in the top of the bread with a knife.

Bake at 375 degrees for 45-55 minutes or until golden brown and a tester comes out clean. The bread will have sound hollow when tapped.

Serve warm with lots of butter…Kerry Gold is a great choice.


Posted in Baked Goods, Breads, Holiday Menus | Tagged , | 2 Comments

Strawberry Banana Smoothie with Coconut Milk

Ah, the feeling of 60 degree weather in March is delightful.  I’m not a usual weather follower so the beauty of today took me by surprise.  I did get out for a great walk with our little Oreo and one of my walking friends and her little Cocoa.  Cocoa is a male toy poodle and Oreo is a male peke-poo and are they tough when they come up against the big dogs on the walking trails!

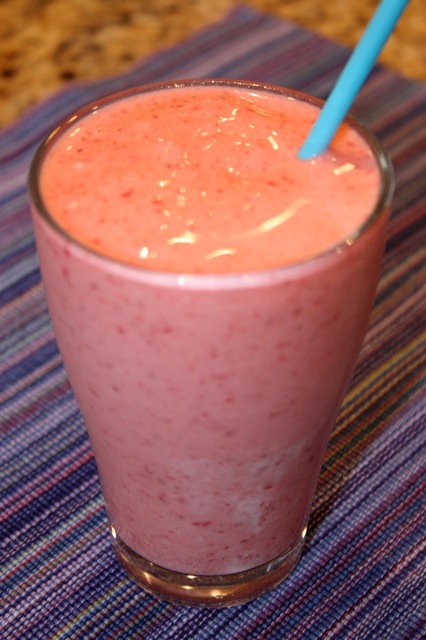
This afternoon, after sitting for 20 minutes soaking up the sun, it felt like a day for a nice cool smoothie.  I used frozen strawberries and a banana, some coconut milk (which you can replace with any of your favorite milks), whole fat plain yogurt, and blended all with a little vanilla.  It’s tasty and refreshing.  If you like a sweeter smoothie just add a teaspoon or so of raw honey or maple syrup.

Strawberry Banana Smoothie with Coconut Milk

  • 1 cup frozen strawberries (or your favorite frozen fruit)
  • 1 ripe banana
  • 1 cup unsweetened coconut milk (or your favorite milk…almond, cow’s, goat’s)
  • 1/2 cup whole fat plain yogurt
  • 1 teaspoon vanilla

Option: 1 teaspoon raw honey or maple syrup

Combine all ingredients in a blender. Serves 2.

Source:  Jackie Mack, Lingonberry Lane.

Posted in Smoothies, Snacks | Tagged , , | 4 Comments

5 Things I Learned from my Mother about Nutrition

 1. Ding Dongs aren’t sustainable food….

My earliest memories of picnics on the spit in Homer, Alaska (http://en.wikipedia.org/wiki/Homer_Spit) were in the Summer of ’69. My Dad was operating heavy equipment on the Spit that summer and he stayed in a hotel in Homer. We would go visit him on Sundays after church, all dressed up, driving 70 miles from our hometown, perhaps via a gravel road in those days in our VW. I remember Ding Dongs from those occasions and of course as a kid, loved the foil covered circular sweetness and who knows what that white stuff inside was/is? Even though I loved Ding Dongs as a 4 year old, these prized packages were not found regularly in our home. They were only purchased for these special outings and that was it. My mother, Carol, was a home economist by schooling and a teacher. She was always on to the latest nutritional news and I know what she must have been thinking when she bought those Ding Dongs. I must say how proud I was recently when the subject of Ding Dongs came up, my 13 year old daughter said, “what are Ding Dongs?”.

2. Plain yogurt is just plain good for you….

My 5th grade teacher (and my sister and brother’s), Naomi Andersen, made yogurt at school for a project way back in the 70’s.  My mom picked up on this recipe and got into a kick and she would make her own yogurt at home.  It was that really good tangy yummy yogurt.  I had no idea that this yogurt was great for our digestive tracts or that it had good bacteria in it that we need in our gut or that it didn’t have any extra flavorings or sugars.  But, I knew there was something about that yogurt that was special.  My brother recently told me he eats plain yogurt and doctors it with brown sugar because that’s what Mom used to make.  Carol would be proud.

3. Sugared cereals are a once in a blue moon purchase for good reason….

Four Mack kids chowing down cereal from boxes laden with Tony the Tiger or Lucky Charms was rare.  We were the Cheerios and Rice Krispies family.   My Dad (John) was instrumental in preparing our breakfast foods during the school year.  Every morning he was up early fixing a large pot of hot cereal to sustain us for the next 4 hours.  We had oatmeal, Malt-o-Meal and other grain cereal usually with raisins and milk and too much brown sugar.  I loved it when the raisins were cooked in with the hot cereal and still do.  I must say I have a bad memory of a chocolate flavored grain hot cereal.  It was nasty and I’ll never forget it…maybe that’s why I’ve forgotten the name.

4. Real peanut butter is the good stuff….

A staple in our home was Adams Peanut Butter.  We’d never want to be the first to open the jar because we’d have to stir in the natural oils and we would lament to our Mom as to why she didn’t buy Skippy. To this day, I love natural peanut butter and can’t go back to the sugary brands with the hydrogenated oils.

5. Apple Cider Vinegar rocks!

This revelation came much later in my life. My Mom, Carol, left this earth in 1999 and I’ll miss her always. Sometime in 1999 when she visited me in our new home in Portland she brought with her a copy of the Bragg’s Apple Cider Vinegar booklet that sings the praises of ACV. On a trip to the store with Carol, I ended up with Braggs ACV and their Liquid Aminos (like soy sauce) in the cart.  I had to chuckle when the amazing health benefits of ACV came up over and over again in my nutrition class last year. Carol always was a master of health foods.  I dug out that book and read it cover to cover in honor of her.

Posted in Nutrition Posts | Tagged , , | 8 Comments

Savory Pork Chops with Mushrooms

A tiny bit of wintery weather has arrived with 2 beautiful peaceful whitish mornings.  The white is gone by the mid-day.  This is winter Portland style.  There have been years when just the arrival of flakes from the sky have shut the city down but maybe we’re getting tough in the foothills….school starts without a hitch and we enjoy the glimpse and peaceful white blanket for a few hours.

I’m sharing a recipe I adapted from Food.com by KL Boyle.  I am lucky to have a few hearty rosemary shrubs in the front yard to flavor the recipe.  I used what I had in the house for the broth (chicken) and added mushrooms because mushrooms fried in butter and pork drippings just sounded scrumptious.  My family and I thought this was a very tasty pork recipe.  I served the pork with steamed sweet potatoes and the combination of flavors was complimentary.

Savory Pork Chops and Mushrooms

  • 4 pork chops
  • 1/2 teaspoon salt or to taste
  • 1/2 teaspoon pepper or to taste
  • 1 tablespoon fresh rosemary, finely chopped (or 1 teaspoon dried)
  • 2 tablespoons butter (for cooking pork chops)
  • 1/2 sweet onion, sliced
  • 1 cup chicken broth
  • 2 tablespoons butter (for broth)
  • 6 or more sliced mushrooms

Season pork chops with rosemary, salt and pepper.  Heat butter in skillet and add the pork chops to cook through, browning the chops nicely.  Make sure they are cooked thoroughly. Remove the chops and set aside on a platter, covering to keep them warm.  Add sliced onions and mushrooms to the pan and saute until they are soft.  Add the chicken broth and scrape the pan for pork drippings to flavor the broth.  On at least medium heat, let broth reduce to about 1/2 about 5 minutes.  Melt the last 2 tablespoons butter into the broth.  Pour broth with onions and mushrooms over chops on the serving platter.  Serve immediately.

Source:  Adapted from Food.com, KL Boyle.

Posted in Main Dishes, Pork, Winter Season | Tagged , , | 1 Comment

Caesar Salad with Lemon

I have to admit, I just had the yummiest lunch!  I made a garlic and lemony caesar salad with avocados, red pepper and fresh parmesan cheese.  That is a winning combination.  The flavor jumps out of the salad with the potent garlic, lemony kicker, rich avocado and parmesan (can you tell, I love this salad and really should make it more often?).  This salad combination compliments any Italian dish and is apparently a wonderful lunch meal on it’s own.  You can add cooked chicken breast if you have left overs for a main meal.

The original inspiration from this salad came from The New Basics Cookbook by Julee Rosso and Sheila Lukins, authors of The Silver Palate.   I’ve made a few changes, likely the most glaring one was I reduced the olive oil in half, and I switched out the white wine vinegar for apple cider vinegar.  I did omit the lemon zest but feel free to add that in if you are a lemon zesty person (1 tsp).   Enjoy this light tasty treat.

Caesar Salad with Lemon

Combine the lettuce and red pepper in a large salad bowl:

  • 1 large head of romaine lettuce, rinsed and dried and torn or chopped
  • 1 red pepper, sliced
  • 1 avocado, sliced or diced (cut avocado right before serving)
  • Freshly grated parmesan to taste (set aside)

Lemony Caesar Dressing

  • 3 tablespoons fresh lemon juice
  • 2 cloves garlic, minced or pressed
  • 1 teaspoon apple cider vinegar
  • 1/3 cup extra virgin olive oil
  • Sea salt and black pepper to taste

In a small mixing bowl, add the fresh lemon juice, garlic and apple cider vinegar and combine. Slowly drizzle the olive oil into the dressing whisking constantly. The dressing will thicken nicely. Add sea salt and pepper to taste.

Just before serving your salad, combine the lettuce and pepper with the dressing.  After they are coated well, cut and add the avocados and parmesan cheese and combine or just sprinkle them on top for a lovely presentation.  Serves 4-6.

Options:  Combine 1 teaspoon lemon zest with dressing or add sliced chicken breast for a main meal.

Source:  Adapted from The New Basics Cookbook by Julee Rosso and Sheila Lukins

Posted in Lunches, Salads, Vegetarian | Tagged , , | 3 Comments